The second floor of the Mortuary is the place where The Nameless One (TNO) initially awakens. It has a total of eight rooms that all form part of the circular contour of the Mortuary.
Access to the stairs leading down to the Mortuary Ground Floor requires the Mortuary Sanctum Key which is located on the Mortuary 3rd Floor.
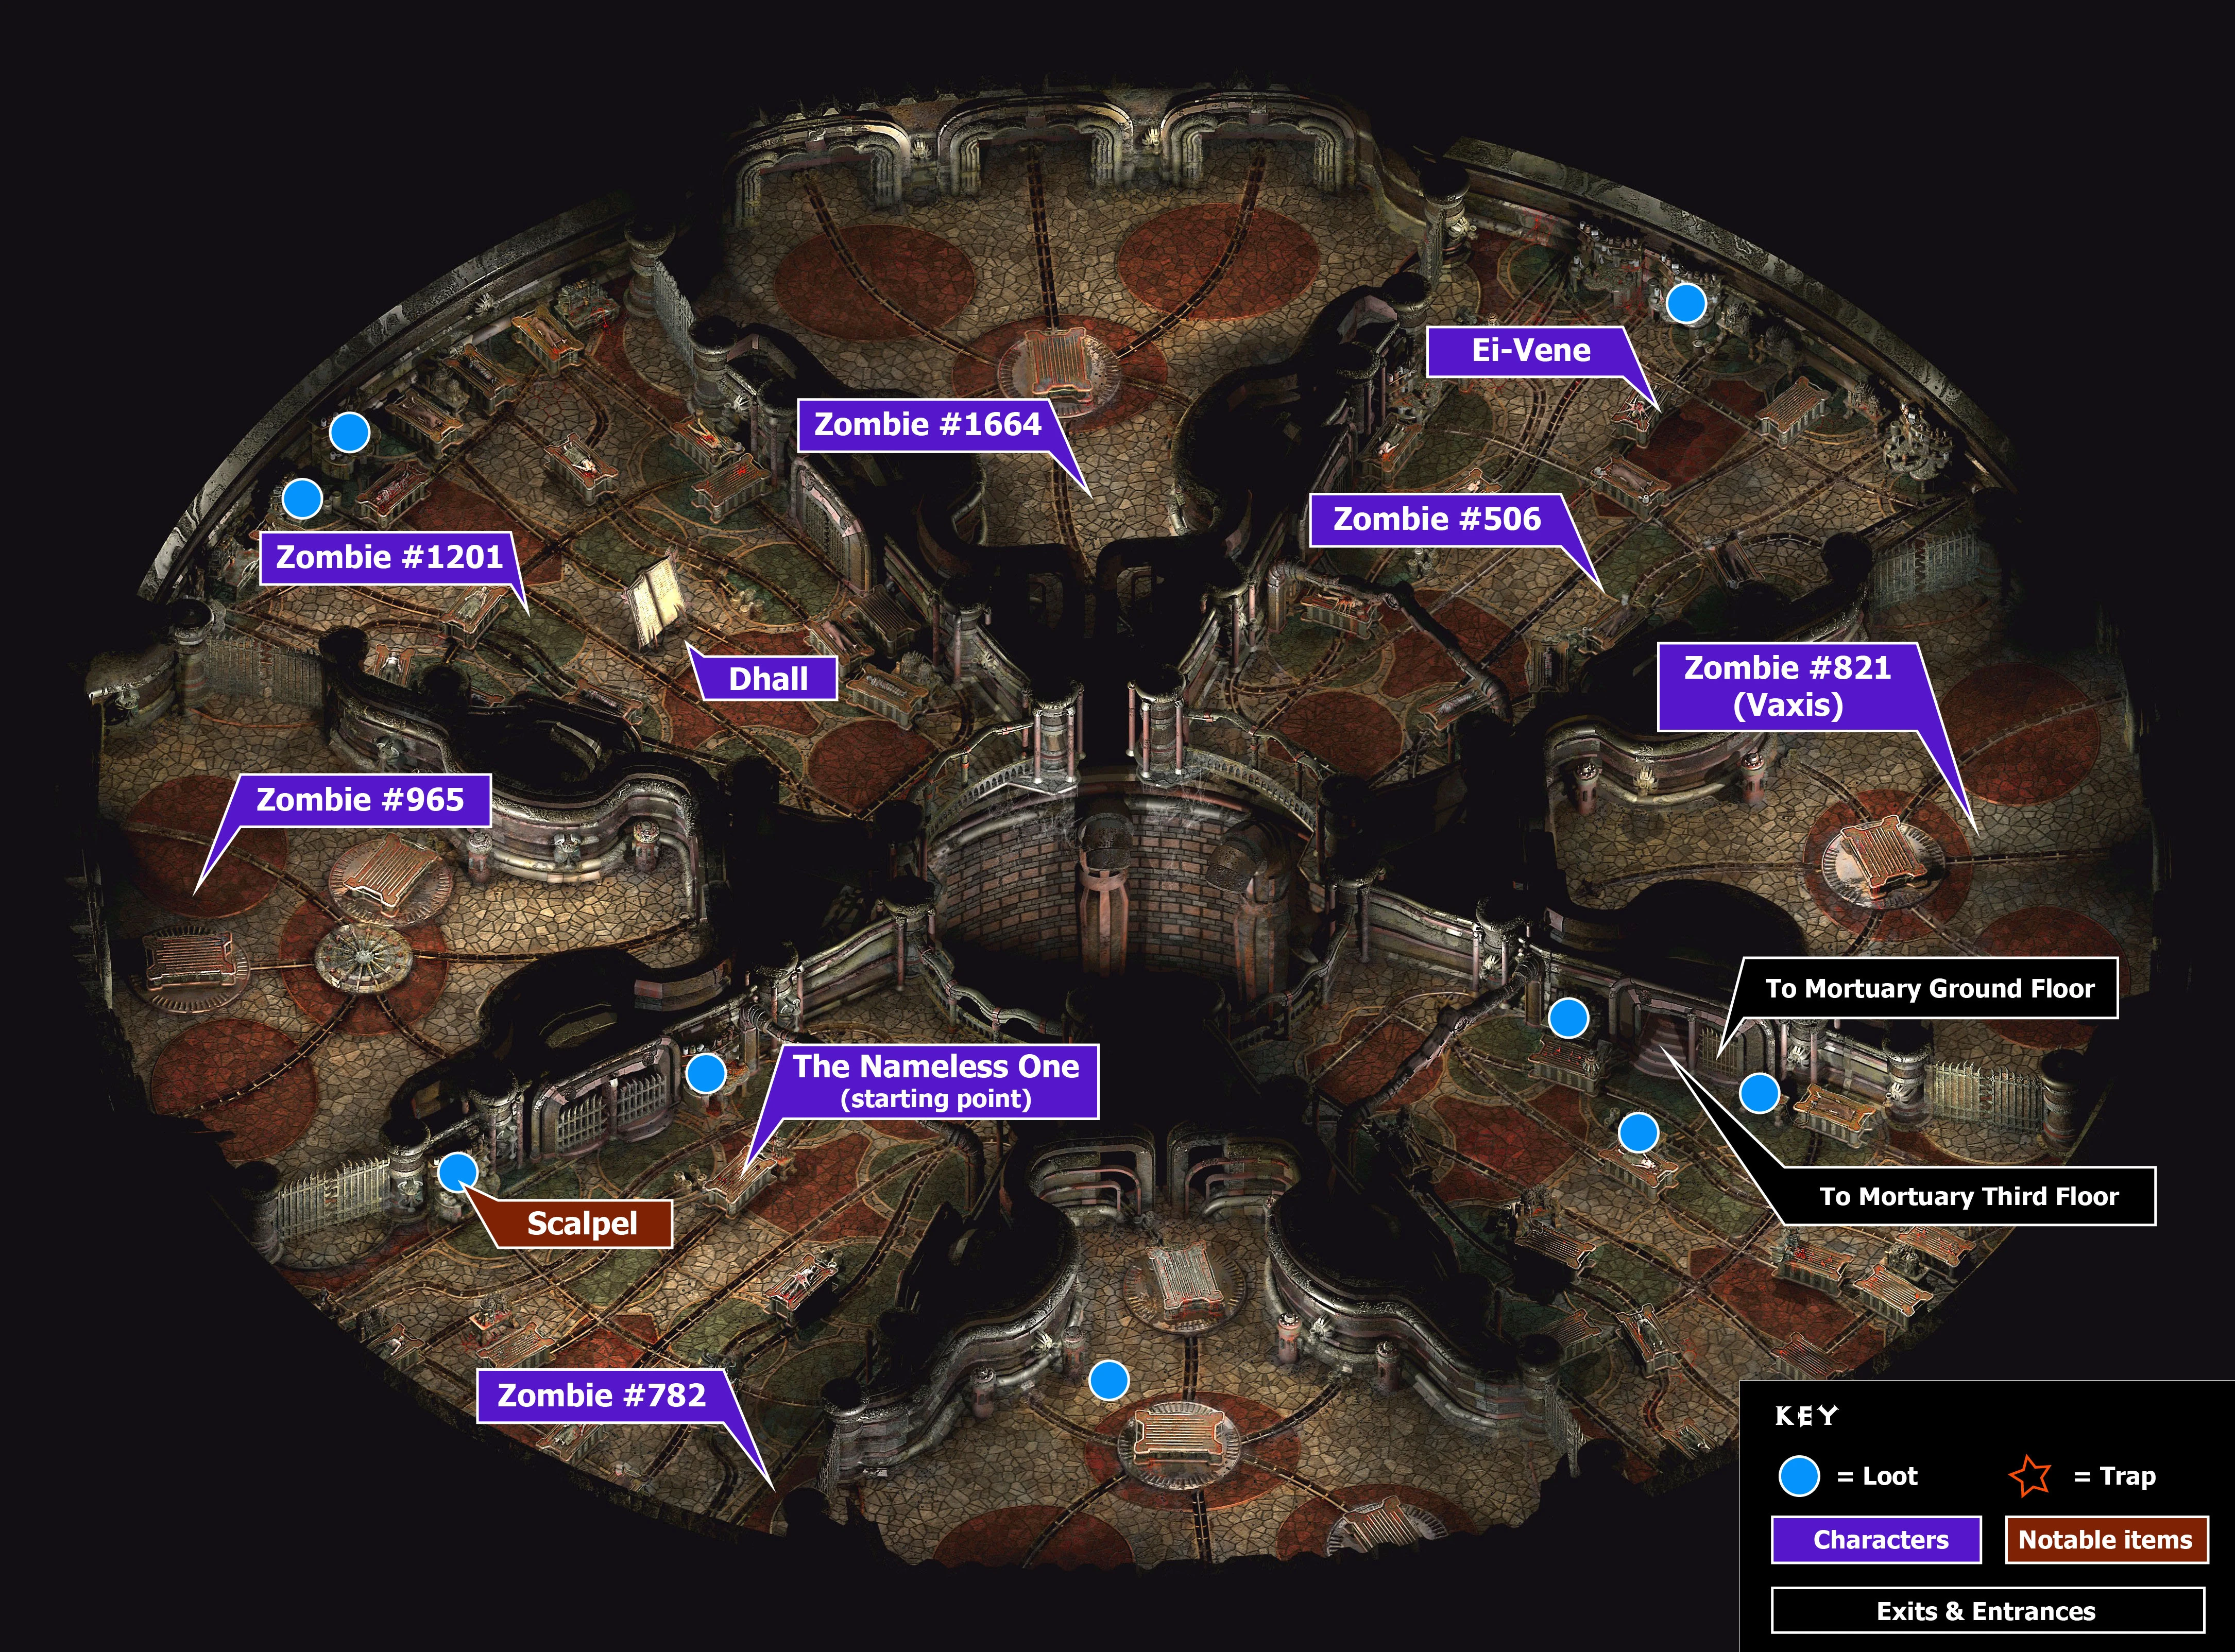
Map
Click the map to enlarge it.
To view X, Y coordinates in-game, press L.
Quests
- Find Pharod
- Find your missing journal
- Fetch Embalming Fluid and Needle for Ei-Vene
- Fetch the Embalming Key for Vaxis
Southwest Preparation Room
| “ | This room is locked tighter than a chastity belt | ” |
—Morte | ||
This vinegar and formaldehyde smelling room is where the Nameless One awakens for the first time, amidst gutted corpses laying on slabs tended to by three zombie workers.
It is located, as its name describes, in the lower left corner of the map, at the 7:30 position on the clockwise circuit of rooms that leads out of the second floor.
Waiting with TNO for him to awaken on a blood-stained slab is the floating skull, Morte, who immediately joins the party. The room is initially locked and requires a key to open, which is held by Zombie #782.
TNO will awaken here every time he dies, if the place of his death is nearer to the Mortuary than it is to the other resurrection points.
Creatures
- The Nameless One
- Morte
- Zombie #782 (X=1250 Y=2870)
- Zombie #825
- Zombie #569
Items
- 2 Bandages (X=1400 Y=2100)
- Preparation Room Key (held by zombie #782), which unlocks the door (X=700 Y=2300) leading to Room 2.
- 1 Scalpel (X=900 Y=2300)
Room 2
This room contains 3 zombies and no items, it is when you enter this room that Morte suggests that TNO should start a new journal. Morte also develops an attraction to the female zombies in the room and feels as if he wants to share a coffin with one of them.
Creatures
| “ | Look chief, these dead chits are the last chance for a couple of hardy bashers like us... | ” |
—Morte | ||
Receiving Room
The Receiving Room contains five zombies, three male and two female, and Dhall, a Dustman scribe who notes in his giant logbook all the shells that have passed through the room. He calls it the "Waiting Room" as it is where all the bodies come to wait for the True Death. He has seen the Nameless One spontaneously rise from the dead more times than he can count and been keeping that fact secret from his colleagues.
Zombie #1201 has a note in its mouth that can be extracted with a scalpel, which rewards 250 XP. Deciphering the note's puzzle yields the Rule-of-Three Earring.
Creatures
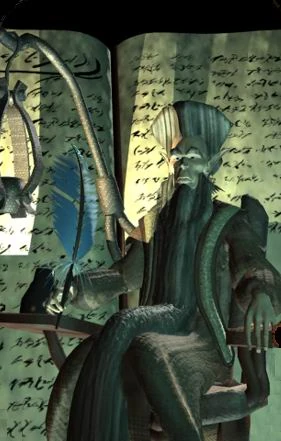
Dhall with his gigantic logbook behind him
- Dhall (X=1270 Y=1180)
- Zombie #1201 (X=1000 Y=950)
- Zombie #396
- Zombie #1072
- Zombie #1096
- Zombie #1094
Items
- Receiving Room Logbook (X=600 Y=1000)
- Fist Irons (X=700 Y=850)
- 13 Copper Commons (X=700 Y=850)
- Note From Corpse 1201, in the zombie of the same name's mouth.
Room 4
This room is empty, except for one zombie wondering around.
Creatures
- Zombie #1664 (X=2090 Y=930), who is carrying a Receiving Log Page with TNO's entry on it.
Embalming Room
This room is where recently arrived corpses get embalmed so as to slow their decay when they are raised to become zombie workers. Ei-Vene is a tiefling embalmer working there who mistakes TNO for a zombie, ordering him to fetch her Needle and Thread, and Embalming Fluid. She rewards an HP increase upon completion of the quest.
Creatures
- Ei-Vene (X=3150 Y=780)
- Zombie #257
- Zombie #506 (X=3130 Y=1080), who yields 100 XP if its stitches are cut with a scalpel, revealing another number on its forehead: #78. This also gives a Needle and Thread.
- Zombie #985 (X=2934 Y=1290) from who TNO can get a Left Arm 985.
Items
- 1 Bandage (X=3250 Y=600)
- 1 Needle and Thread (on a zombie, X=3130 Y=1080)
- 1 Left Arm 985 (on a zombie, X=2934 Y=1290)
Room 6
This room is empty, except for one shambling zombie, who requires further scrutiny.
Creatures
- "Zombie #985" isn't a zombie at all. He can help TNO escape from the Mortuary, in exchange for a favor. He can also disguise TNO as a zombie: as long as TNO doesn't break character, the Dustmen on the other floors will not look at him twice.
Southeast Preparation Room
This room contains only a few items.
Items
- 1 Jar of Embalming Fluid (X=3200 Y=2215)
- 1 Bandage (X=3050 Y=2000, locked container, can be bashed open by Morte)
- 1 Ancient Copper Earring (X=3050 Y=2000, locked container, can be bashed open by Morte)
Room 8
The southernmost room can be accessed after acquiring the Mortuary Sanctum Key, but it is virtually empty.
See also
| The Hive | |
| Mortuary Area (Mortuary | Gathering Dust Bar | Mausoleum) • Northwestern Area • Marketplace Area • Smoldering Corpse Area (Smoldering Corpse Bar | Fell's Tattoo Parlor) • Alley of Dangerous Angles • Ragpicker's Square | |
| Under the Hive | |
| Trash Warrens • Buried Village (Pharod's Court) • Weeping Stone Catacombs • Dead Nations • Warrens of Thought • Drowned Nations • Tomb of the Nameless One | |
| Other Wards | |
| Tenement of Thugs • Alley of Lingering Sighs • Lower Ward (Great Foundry | Bones of the Night) • Clerk's Ward (Brothel for Slaking Intellectual Lusts | Civic Festhall) • Undersigil | |
| Mazes | |
| Player's Maze • Modron Maze • Black-Barbed Maze | |
| Outlands and Hells | |
| Outer Curst (Traitor's Gate Tavern) • Inner Curst • Curst Underground • Curst Prison • Outlands • Baator (Pillar of Skulls) • Curst Gone • Curst in Carceri • Curst Administration | |
| Fortress of Regrets | |
| Fortress Entrance • Fortress Main Hall • Trial of Impulse • Maze of Reflections • Fortress Roof | |